0 Comments
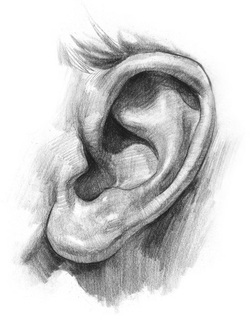 Today in class, students finished up their ear drawings. Ears are tricky to draw. So much attention must be paid to the "ridges and valleys" to make it look 3-D. Students learned a shading technique called "shadow mapping" that helps with this process. After finishing their ear, they also tried their hand at drawing hair. The image below was the final "inspiration image." 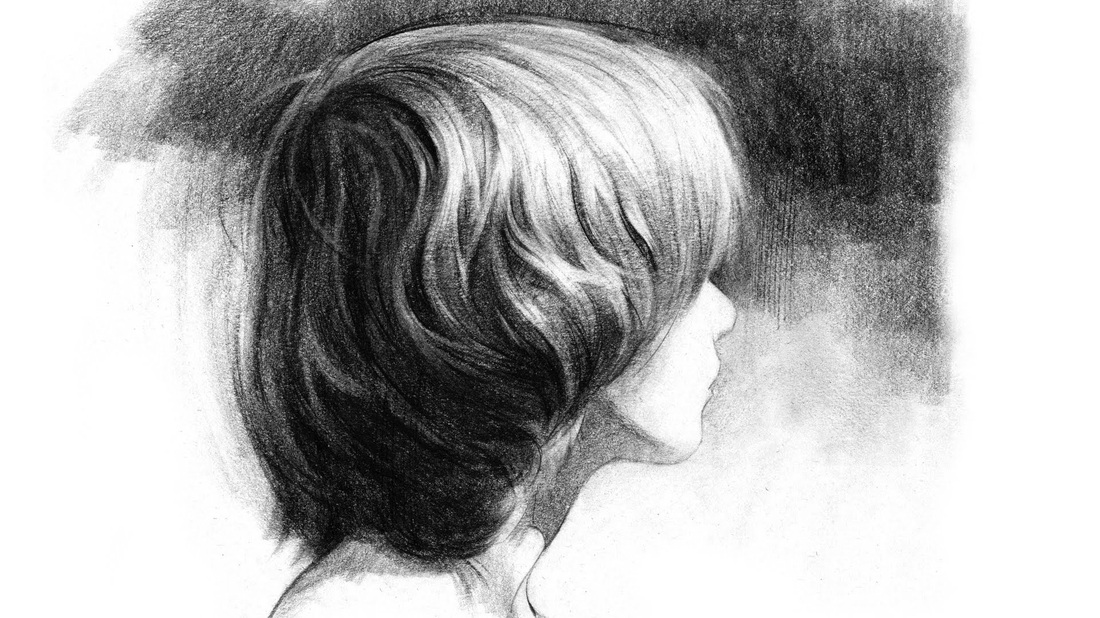 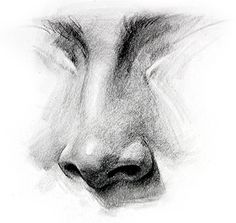 Student's learned how to draw a nose in class today. They also got a jump start on drawing ears and will finish them next class!
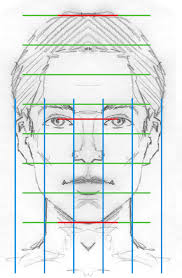
For a more detailed breakdown of today's lesson, click here. For more Drawing Unit information, resources, and standards, check out the Foundations of Art Drawing Project page, or click here. 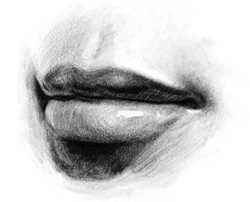 Students learned to draw lips today!
Students watched two videos from the website proko.com. One dealt with the anatomy of the face. The other was a tutorial on how to draw lips. We paused the video at the end of each stage, then students completed their drawing to match the video. This made drawing the detailed image of the lips less intimidating. If you want to learn more about drawing the human form (caution: nude models used as reference), proko.com is a great resource for you. For a more detailed breakdown of today's lesson, click here. For more Drawing Unit information, resources, and standards, check out the Foundations of Art Drawing Project page, or click here. 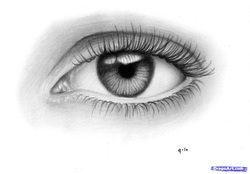 Before jumping into drawing portraits, students will first learn how to draw the basic features of the face: eyes, lips, nose, and ears.
Today in class, students took notes on "tips and tricks" to follow when drawing eyes. Each then drew the eye featured in this post, but by breaking it down into step by step process. For a more detailed breakdown of the Day 6 lesson, click here. For more Drawing Unit information, resources, and standards, check out the Foundations of Art Drawing Project page, or click here. (This lesson is adapted tutorial found on DragoArt.com)  In class today, students finalized their landscape drawing!
For a more detailed breakdown of the Day 5 lesson, click here. For more Drawing Unit information, resources, and standards, check out the Foundations of Art Drawing Project page, or click here. (This lesson is adapted from a tutorial found at DragoArt.com) 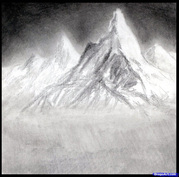 Yesterday, students wrapped up their still life drawing. After comparing their work to the original image, students added a written reflection to their drawing portfolio that described the following prompts:
1. Describe one positive aspect of their drawing. 2. One improvement that would make their image more successful. 3. A drawing skill they learned through drawing their first still life. Today, students began their landscape drawings. This image provided shows the progress students made in class. For a more detailed breakdown of the Day 4 lesson, click here. For more Drawing Unit information, resources, and standards, check out the Foundations of Art Drawing Project page, or click here. (This lesson is adapted from a tutorial found at DragoArt.com) 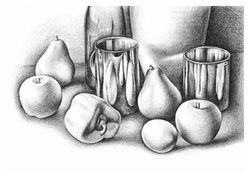 After creating the "bones" of their still life drawing last class, students dove head first into applying value to their drawings. The image to the left documents the end drawing "goal".
For the complete PowerPoint from today's class with drawing instructions and steps to creating this still life drawing, click here. For more Drawing Unit information, resources, and standards, check out the Foundations of Art Drawing Project page, or click here. (This lesson is adapted from http://www.artyfactory.com/still-life/still_life_pencil.html) |
 RSS Feed
